
You could say the power is out of proportion..... Both look sharp in new paint!
MCIS BUSINESS TRAIN
Recently released from Fogelsinger Rail are Michigan Interstate's two business coaches "Lake Erie" / "Lake Huron" and a stunning EMD F7A / B set. I have to say the equipment turned out really nice and the time spent to develop a scheme for the F7s that was classy while consistent with the rest of the MCIS diesel fleet looks great. Believe I went through around 8 versions with alot of friend feedback before arriving on the final scheme. The equipment is expected to be released from contract shop in early August arriving via Lake State Railway transfer. From there the equipment will head to Mt. Pleasant MAC Shop for delivery inspection and placement into service. Company officials expect the equipment to be ready for fall festivities including Halloween, Thanksgiving, and ultimately Christmas.


I can honestly say that I have attempted my first time at weathering railcars with a variety of mediums and overall impressed with the finished products. If the first five cars turned out this well, then there is only room to improve my skills and produce even more realistic effects. Up until now I have contracted out my weathering of locomotives and cars, but even with me getting into the art I still expect to continue to job out 3 cars for every one I complete because of one specific thing; "Uniqueness". Just like every car is unique, every person who has weathered for me also has a technique different then the next person. This in my opinion provides for a nice mix of cars that bring alot of character to the railroad.
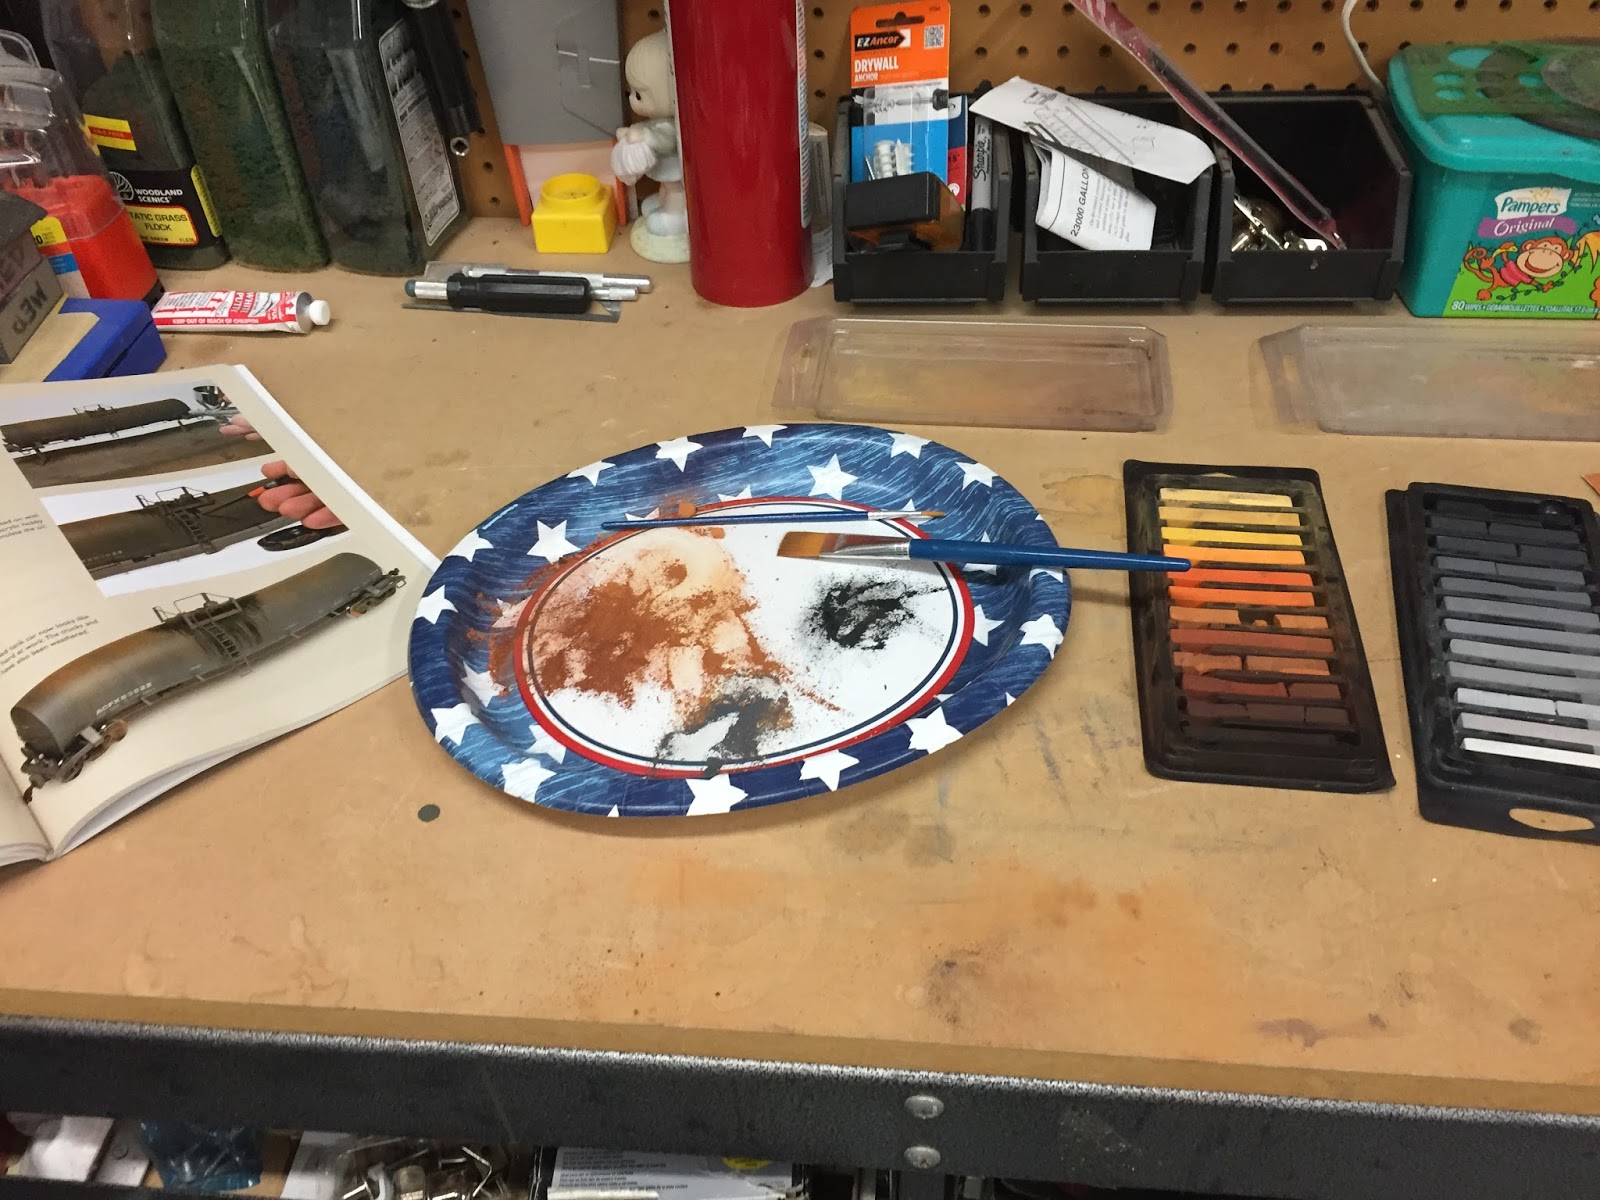
For my instruction I used the multiple instructional sources "Done In A Day" by Pelle Soeborg and various "How To" articles from Model Railroader. Future work I will try some of the techniques showcased by Matt Snell and others from MR, RMC, and MRH. With the web content out there, there is no shortage of great articles describing tips and tricks. My suggestion and like others have said, use a few test cars that you dont mind screwing up on. In my case I have 3 Accurail 4600 hoppers that will never see service again so they made for good test beds to perfect my technique.
Materials used:
- Various Modelmaster & Polly Scale Acrylic paints
- Vallejo matte (for rust adherence)
- Pastels (earth tones and grays) and Bragdon dark rust
- Testors dullcote
- Microscale FRA224 yellow reflective striping / graffiti decals
- India ink / black craft paint (Asphalt spill on tank car)
- 70% isopropyl alcohol
All of the cars got a fade, some more than others and from there using photos from the book and online just enjoyed the art. One really neat effect is the rooftop rusting that has a neat texture. Enjoy photos of the completed work, mind you that I did this in my garage with the door open in the heat of a Texas afternoon. Not only did I weather, but lost some water weight as well..... model railroading can be a healthy habit!!

NS boxcar was my first car to try out the airbrush wash "fade"
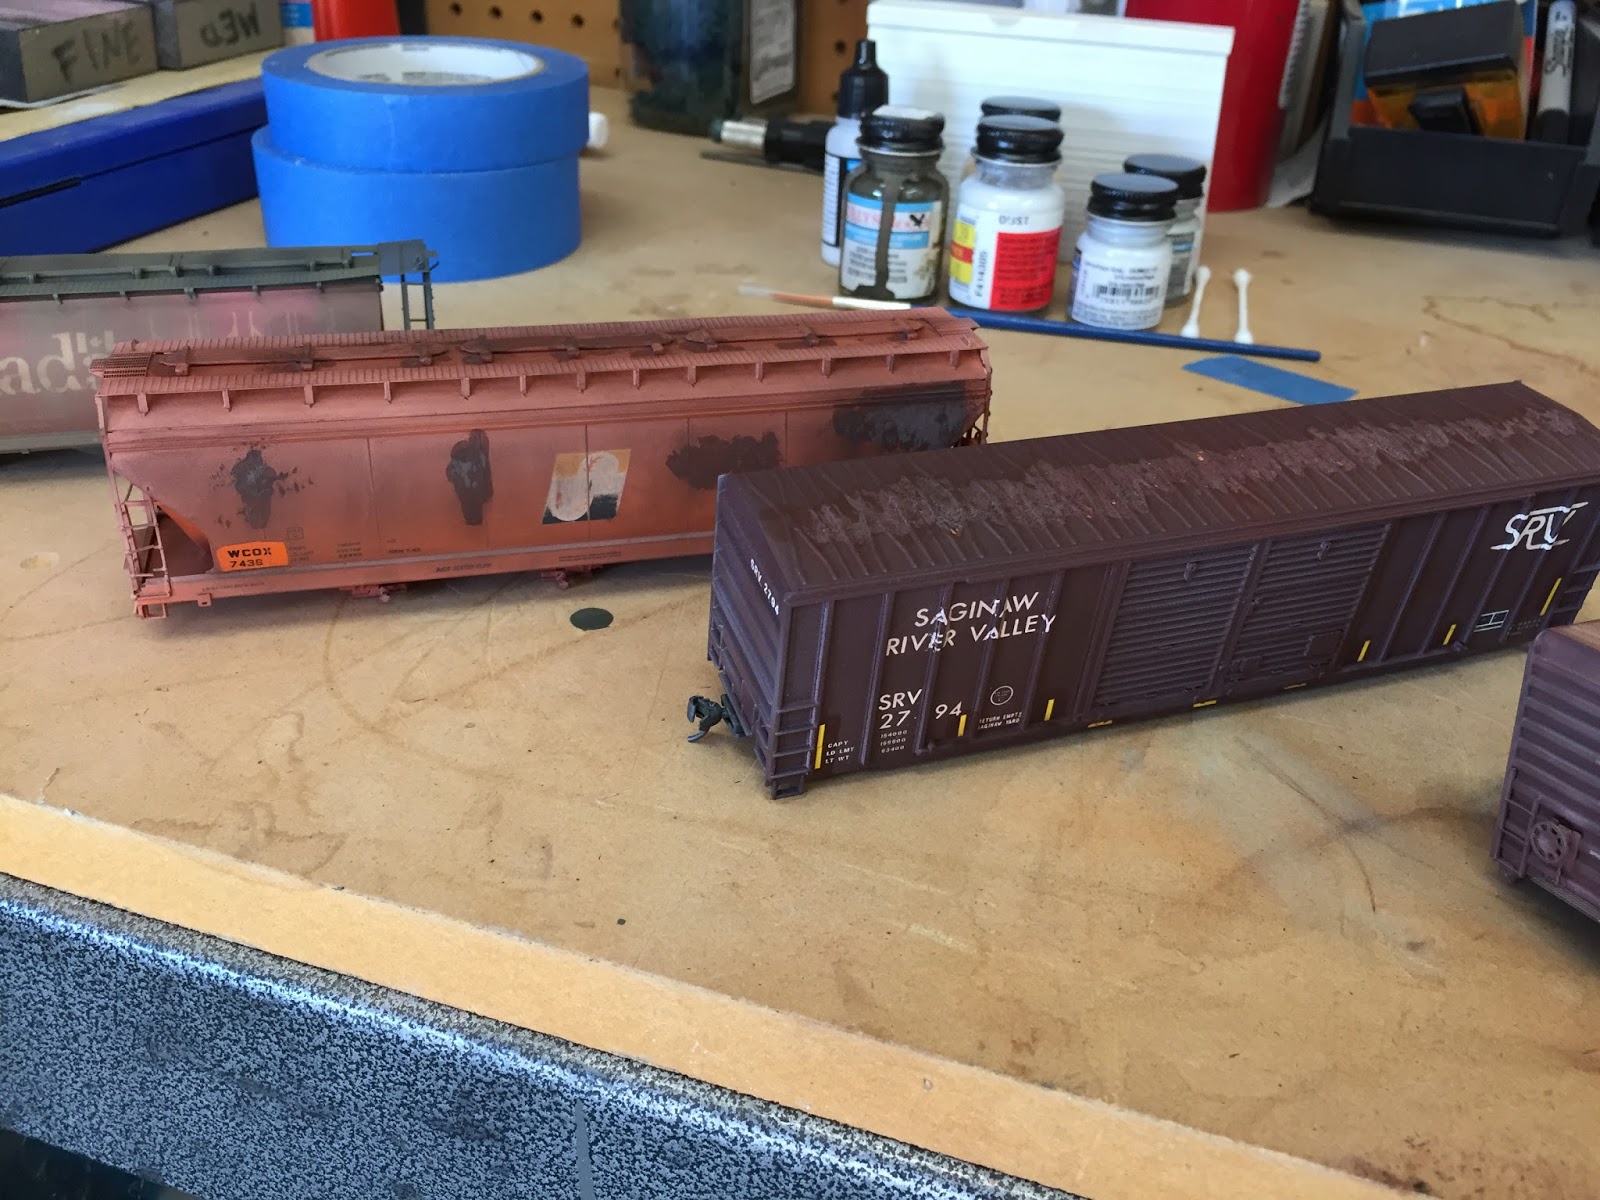
Patch out and roof rust. On the SRV boxcar I actually used a Q tip with window cleaner to remove the light fade over where the reflective tape is located. This gives the effect that someone cleaned the paint before applying the reflector.. I have seen this on many cars.

Canadian Wheat Board car that has seen better days.... not many years left.

Overall view of the five car batch completed last Friday

Worn out railcar with a fresh tag..... Must have been transiting the DVE out east.

Load of asphalt enroute to Interstate Asphalt's Bay City Terminal.

The fade and rust effects turned out really nice.
WIND ENERGY RAILCARS
Earlier this summer I had shown you a few 89' flats wind wind blades that I had done for a friend as a model. Well beings I model modern day I felt there was a great opportunity to bring wind energy business to the MCIS. Since those comments I worked out the plan to build a wind blade unit train. For the layout the train will consist of 10 (68' flatcars). These shorter flatcars are a good selective compression with the shorter 102' blades, additionally for you guys with smaller layouts and tighter curves the shorter railcar truck centers and overall bolster to bolster length of the blade from root to tip fixture allow for better curve negotiating. With 10 cars that will allow for 5 blades to be hauled, beyond the 10 cars I may add hub / nacelle cars or an additional 2 blade cars for a total of 12. But for now we are focused on 10 cars for the late fall operating session.
In modeling the 68' there were things that I wanted to capture. The first being a smooth steel deck, a side mounted hand brake, and a hodge podge fleet of cars with various pasts. Knowing how it can be to find a out of stock Atlas Trainman product I was lucky to come across a stock of seven 68' flats at Spring Creek Model Trains in Deshler, NE. Yep bought them all with 2 being DODX marks and 5 being ARR marks. I also recently purchased a TTJX on ebay and have a supplier for the last two cars. So hodge podge fleet.... check. The next item was the smooth steel deck and I had two different ways to complete this. One i sand the deck smooth or two I purchase one of the laser cut steel deck overlays on the market. I decided with the sanding option so lets take a look at how I got the smooth steel look and how the blades are setup on the car.


Finished product with root and tip fixture mounted to the railcars. The blade is removable, however once in service it will be temporarily secured in the root fixture with a small amount of white glue.
With cars prepped and fixtured I spent a few evenings testing the blades clearance around the layout. If you decide to have this type of load on your layout, it will a trial and error testing to see what works best. To allow moving of fixtures if necessary I mount them to railcar using Elmers extreme glue stick. It holds well but can be removed with a knife if necessary.


Checking scale clearances, in this case in the curve we have 6' between the blade tip and signal mast.
Look forward to seeing the unit wind train on the layout later this fall. Not only will it be something to see but for the operators, it will come with a HIWI bulletin to govern movement when meeting trains or passing lineside restrictions that are "close clearance".
BAY INDUSTRIAL SPUR CHANGES
Last item to note for this update are some changes made to better accomodate industries on the Bay Industrial Spur. Interstate Asphalt and Fort Mackinac Corrugated changes locations. This allows me to model half of asphalt storage tanks (with contents inside) and also creates a partial view block for the area.
Interstate Asphalt will have three spots and Fort Mackinac will have four. While the industries have not been fully developed, the changes made will be tested out by the operator of the Y-BA04 "Bay Industrial Job" during my late fall session.

View east down Bay Industrial Spur (Interstate Asphalt on right, Fort Mackinac Corrugated to the left)

Another view looking northwest toward Graystone Cement. Interstate Asphalt in the foreground.

Checking reach in clearances to access switches for the three industries. I may end up cutting the tanks down some for better reach. However this job is handled by two operators so one would be on the inside of the layout left of the tanks and other operator right of the tanks.
I think you can agree, the month produced great results in a host of areas. Another great way to help combat that summer modeling slump is having a host of different projects. In this case no scenery work at Grays Lake was complete, but progress was made in other areas. I hope to get back on scenery work at Grays Lake this month. Check back later in August to see what becomes of that task. Thanks for taking the time out of your day to read my update. I hope everyone has a safe rest of summer.
GM
